The example below shows how to get the ExecutionLogs from a SQL Server instance between two dates.
I'm going to use Excel 2013 as it's the latest version and the one I have to hand.
Create a blank workbook by selecting "Blank workbook" (which is usually the first option in the middle of the screen);
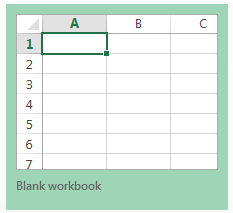 |
| Excel 2013: New "Blank workbook" Tile |
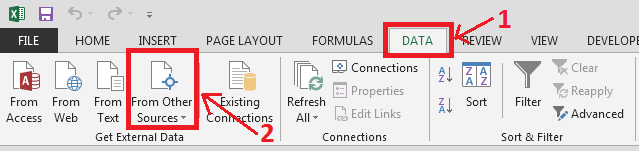 |
| Excel 2013: Data Page |
This will then open the "Choose Data Source" dialog;
 |
| Excel 2013: Choose Data Source Dialog |
This dialog also isn't part of Excel, it's a separate application. Sure Microsoft will score some marks for re-use of a standard Windows component but the change in interface is jarring to say the least ... and it gets worse.
Leave "New Data Source
 |
| Excel 2013: Create New Data Source Dialog |
Anyway populate fields and 2 in the dialog, selecting "SQL Server" from the drop down (in mine it was at the very bottom). Then click "Connect ...";
 |
| Excel 2013: SQL Server Login |
 |
| Excel 2013: SQL Server Login Dialog - Extended |
Click "OK".
Click "OK" again (on the "Create Data Source" dialog) - do not pick a table in the bottom drop down, we're going to use SQL with parameters.
The data source you just created should be select (in the "Choose Data Source" dialog) so just click "OK".
You will then be presented with the "Query Wizard - Choose Columns" dialog;
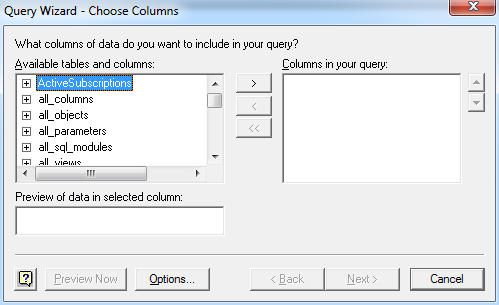 |
| Excel 2013: Query Wizard - Choose Columns |
Click "Cancel" (at the bottom right);
 |
| Excel 2013: Microsoft Query Confirmation Dialog |
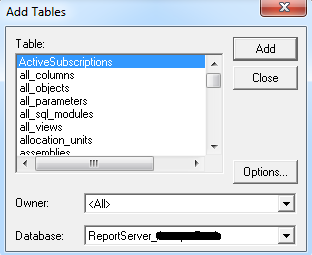 |
| Excel 2013: Add Tables Dialog |
 |
| Excel 2013: Microsoft Query |
 |
| Excel 2013: Microsoft Query - SQL Dialog |
SELECT
EL.InstanceName,
EL.ItemPath,
EL.UserName,
EL.ExecutionId,
EL.RequestType,
EL.Format,
EL.Parameters,
EL.ItemAction,
EL.TimeStart,
EL.TimeEnd,
EL.TimeDataRetrieval,
EL.TimeProcessing,
EL.TimeRendering,
EL.Source,
EL.Status,
EL.ByteCount, EL.AdditionalInfo
FROM ExecutionLog3 EL
WHERE EL.TimeStart >= ["Min Start Date"]
AND EL.TimeStart < ["Max Start Date"]
ORDER BY EL.TimeStart DESC
Enter the SQL and click "OK".
NOTE: There are a couple of "gotchas" here. The SQL is processed prior to being run and it isn't particularly flexible. If you use ANSI SQL (JOIN ... ON ...) then you won't get the graphical interface at best, or it just won't work. Equally including square-backets [] seems to break the SQL, as does having "dbo." in front of the table name.
"Broken" SQL is usually identified by you being told that the SQL doesn't support the graphical interface. This is usually a prelude to a more obscure error.
Providing everything is working OK you'll see;
 |
| Microsoft Query: Sample Data |
This closes Microsoft Query and returns control to Excel. The "Import Data" dialog will now appear;
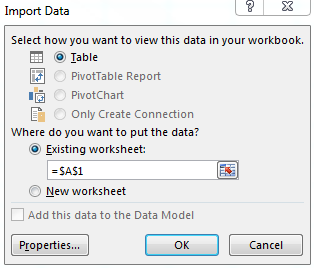 |
| Excel 2013: Import Data Dialog |
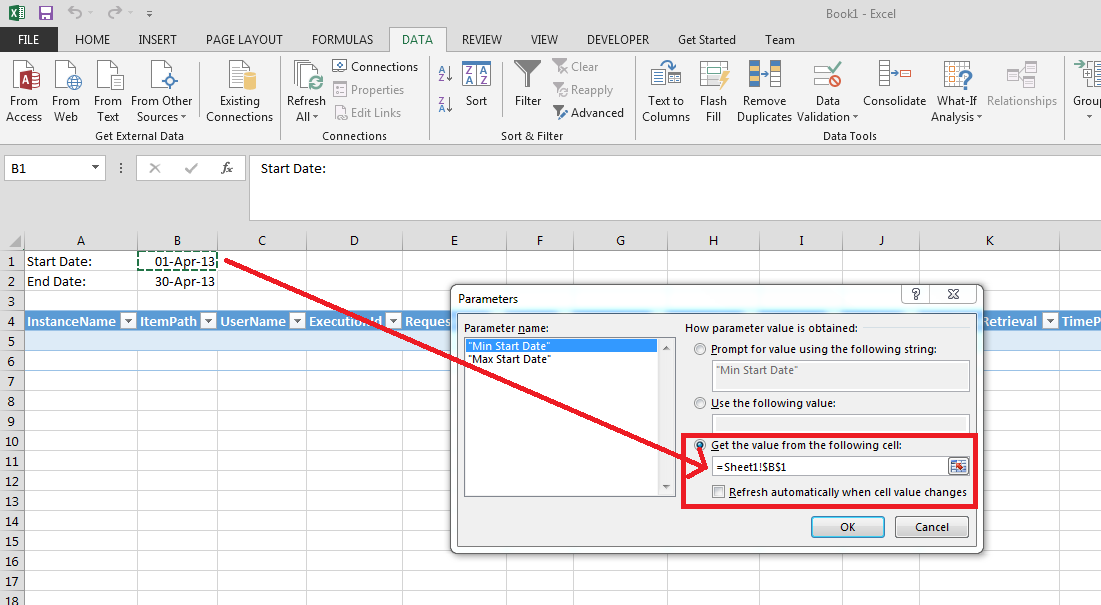
Enter "Start Date" in A1, and "End Date" into A2 (just labels). And then two dates into B1 and B2 (these will be the from/to dates we run the report as);
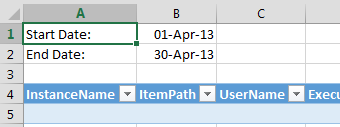 |
| Excel 2013: Parameter Values in Excel |
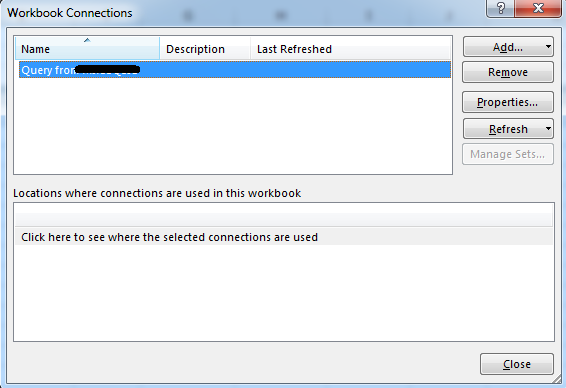 |
| Excel 2013: Connections |
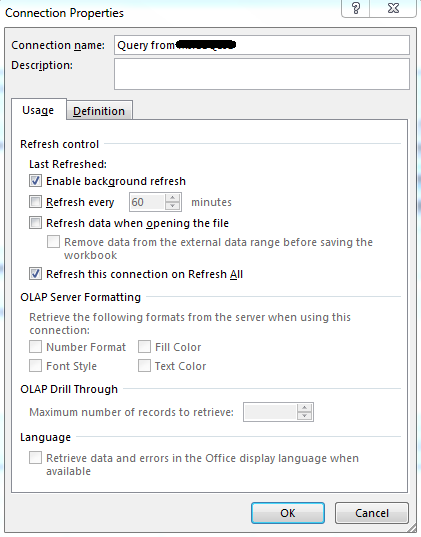 |
| Excel 2013: Connection Properties |
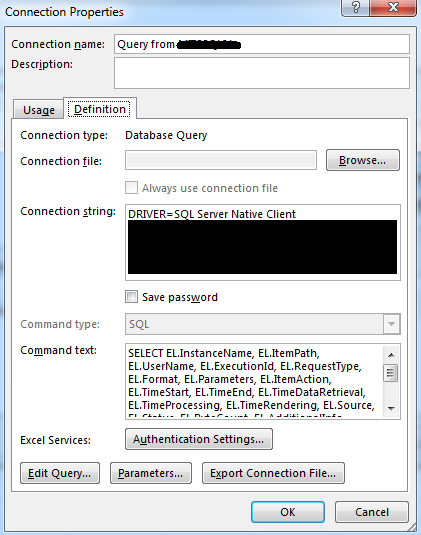 |
| Excel 2013: Connection Properties - Definition Tab |
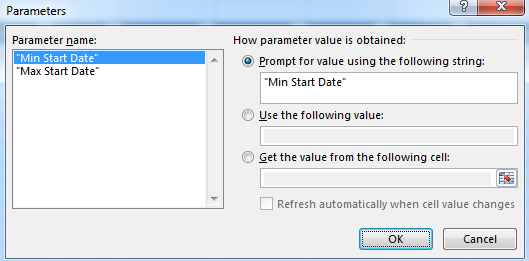 |
| Excel 2013: Parameters |
 |
| Excel 2013: Default Parameter Value |
Repeat the process with the Max Start Date Parameter.
Click "OK" (closed Parameters dialog)
Click "OK" (closes Connection Properties dialog)
Click "Close" (closes Workbook Connections dialog)
Click "Refresh all" (in the ribbon)
And we're done! If this was useful for you don't forget to leave a comment ...


