I've not done a great deal of playing around with SharePoint Online in the past and so jumped at the chance during a recent rollout. One of the things I've always wanted to do is automatically group documents in a SharePoint document library based on the name of the file. To me this feature has always been one of the ones I've most wanted - the ability to name a word document (for example);
High-Level Design - Microsoft - Exchange - Andy Pellew - 20180510.doc
And have the SharePoint document library where I've saved it extract the Document Type, Vendor, Software, Author, and Date directly into the corresponding properties of the document in the SharePoint library (rather than getting the user to update it manually) would be fantastic. In SharePoint Online with the new "Flow" functionality, it looks like this was possible *without* having to resort to SharePoint designer (and the consequent "upgrade issues" use of that software always seems to raise).
So to test this, I set up a new document library called "Help and Support". I added a column called "Active" as a simple Yes/No column (default "Yes"), and then created an "Active Documents" view to only show documents with "Active" set to "yes", and left the "All Documents" view to show everything. I created a new flow (clicking on "Flow" and then "Create a flow").
Once I was happy it was working I uploaded a few documents;
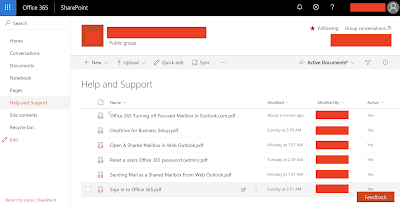 |
| SharePoint Online document library |
You'll notice that all the documents in the view are PDF's. While it would be great to jump straight in and create all the columns I listed above it would be a little complicated for this post, so I'm going to make it simple; if it's a PDF active is "yes", if it's not then active is "no". Clear?
Let's see how it works. Clicking on "Flow" and then "See your flows" takes you to a new page;
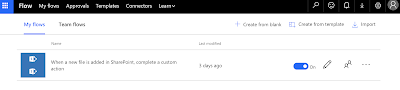 |
| My Flows |
Clicking on the name of the flow "When a new file is added in SharePoint, complete a custom action", this then takes you to the details page;
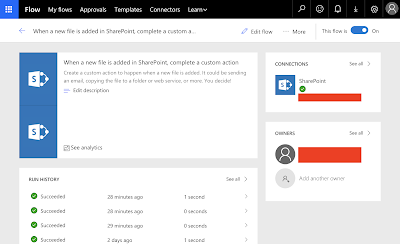 |
| My Flows > Flow Details |
As you can see I haven't changed the description from the default (terrible practice, if it were staying then I would update it!).
Clicking "Edit flow" at the top shows the flow;
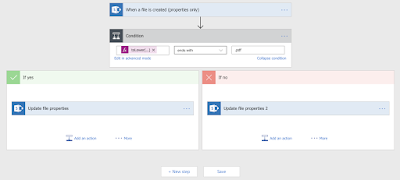 |
| Flow details |
As you can see this is an effortless flow. Basically, it's just a simple condition (does it end in pdf), followed by setting the property depending on the result (yes or no)*.
Starting at the top; the flow fires every time a file is created.
The condition was a relatively simple "end with .pdf" however I wanted to add a small amount of complexity here by converting the name of the file into lowercase so that PDF, Pdf, pdf, etc. are all treated the same. This made things a bit more complicated as there didn't seem to be a way to use the simple editor to do this and I was forced to click "Edit in advanced mode". The code I added was this;
@endswith(toLower(triggerBody()?['{FilenameWithExtension}']), '.pdf')
From the simple dialogue I started with this;
@endswith(triggerBody()?['{FilenameWithExtension}'], '.pdf')
The help showed that toLower was a function so when I dropped that in it worked the first time - I was actually very impressed!
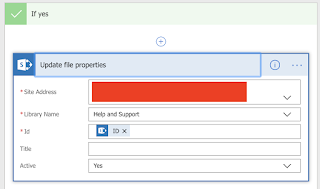
Next was updating the file's properties based on the result. Here everything was very much "select from a list"; picking SharePoint, picking "Update file properties", then the SharePoint site, and document library.
The one little bump in what was looking like a very intuitive process (the Active field had already appeared once I picked the library name) was the mandatory field Id;
 |
| Update file properties dialogue |
As you can see it's currently set to the ID of the SharePoint item. It became clear that it should be this on entering the field and help popped up with ID as the only option, but until I'd actually entered and the help had appeared I literally had no idea what this was going to require!
I repeated the process with "if no", setting Active to "no".
Testing was quick and relatively easy - I clicked the "Test" icon and then uploaded a file.
And that was it.
*- Yes, I know, you could just do this in a simple step by doing everything in one go (setting the property based on the filename), but that's not really in the spirit of either or this example or how to do workflows in general!


