Pages

Thursday, March 27, 2014

Creating Embedded Email Links Within Office Documents (Word, Powerpoint, Excel, etc)

We have a new requirement from our users. Basically what they want to do is send a document out to a number of people, have them read it, and then (on the final page) click on a link that will automatically generate an email to a set email address within the company basically saying "I have read and understood this document".

It's actually a pretty simple requirement but something I think is worth documenting just in case it comes up again.

In order to go through this step-by-step I'm going to use Microsoft Word, although you could (in theory) use any Office application.

Let's start with something simple. Open Word;

Microsoft Word: Blank Canvas!
This is basically just a blank word document into which we're going to add the following text;

Here's a simple link;
www.google.co.uk 
Here's a few email tests; 
apellew@gmail.com (blank)
apellew@gmail.com (with a subject)
apellew@gmail.com (with a subject and a body)
As you can see nothing complicated. Paste this into Word (as plain text, just so you don't get any web formatting) and press Ctrl-K and the "Insert hyperlink" dialog box will appear;

Building A Simple URL Link In Word
As you can see the entry box at the top is displaying the text that will appear in the document, while at the bottom you can see the address the link will take you to.

NOTE: If you have any %20 strings (or similar) in the "Address" field then this is because you selected a white space either before or after the URL address. Just click cancel, change the highlighting to not include the spaces, and then try again.

When you return to the document you'll now see the Google address highlighted in blue;
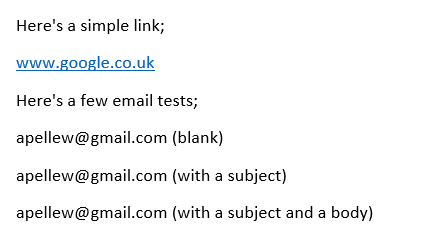
Highlighted Links In Word
Next select the "apellew@gmail.com (blank)" line and again press Ctrl-K. Now when the "Insert Hyperlink" dialog appears click on the "Email address" button at the bottom left;

Inserting an Email Address as a Hyperlink
Here you can enter the details of what you want to display and where you want the email address to go. Just enter "apellew@gmail.com (blank)" in the box at the top, and the email address "apellew@gmail.com" in the email address field. Then click "OK".

Repeat the above process for the second link (with a subject) and enter the subject "THIS IS A TEST".

The final option, an email link with a subject AND a body, is a little more complicated. Word doesn't seem to offer a way of doing this through the "Email address" interface so you'll need to craft the link in direct HTML. The easiest way to do this is to use the same "Existing file or web page" we used to create the first link to Google;

Building a Custom Address To Trigger an Email
Here's the text you need to enter into the "Address" field;

mailto:apellew@gmail.com?subject=TEST WITH A BODY&body=BODY TEXT

This, when clicked on, will create a email with the subject "TEST WITH A BODY" and the email body text of "BODY TEXT". Like this in Outlook;

Email With Subject & Body in Outlook
When you return to your document this will now have all the links highlighted and ready to click. If you export the document to a PDF the links will be maintained.

Wednesday, March 26, 2014

iOS: Downloading SD Video Direct To iPads (When Purchased HD)

This has been frustrating me for a while so I thought I'd write a blog about it. Basically I have access to a couple of 16GB iPads which are ideal for the kids to play with BUT the movies/ TV shows I want them to watch I own in HD and when you look at the size of the HD files - such as Disney's Brave below - 3.42GB in HD vs 1.46GB in SD then the storage on the device is being eaten away pretty quickly;
Disney's Brave; HD vs SD File Sizes
Now back in the days when you used cables to connect iOS to iTunes you could just download the SD version into iTunes and sync it across. Technically you still could with iTunes Wi-Fi Sync but the problem is if you're going to use iCloud (which is just fantastically useful in every other way) to manage your content there doesn't seem to be an obvious or easy way to switch between versions.

As you'll know to download your pre-purchased content you need to go into the iTunes Application your iPad and then touch on the "Purchased" button (bottom right);

iCloud Purchases Tab (iTunes on an iPad)
and then touch the film you're interested in;
Downloading an iCloud Purchase Direct to an iPad
and finally touch the "Cloud" icon to start the download.

Occasionally you'll notice that instead of the "Cloud" icon you'll just get a "Watch" button. I'm not entirely sure what this button is for - it doesn't seem to actually start the movie playing (at least it doesn't on my iPad 2 or my iPhone 5!).

The problem is you can't choose between SD and HD when you trigger the download.

There doesn't seem to be any quick and easy way around this *however* there is a long and complicated way - go back into the iTunes application and search for the video you are interested in and go to the page. Taking "Final Fantasy: The Spirits Within" (as shown above) when you open the films page in the store you get the same iCloud download icon but this time you get the HD/SD option for your iCloud download;
iTunes Store Movie Details - With HD/SD iCloud Option
Hopefully Apple will do something about this - it's not exactly the best user interface in the world and as films get bigger and bigger it becomes more and more important to shrink the filesize prior to starting the downloads.

Friday, March 14, 2014

iOS: Using AirServer To Capture iPad Videos

This is a fairly quick blog post that's come up because we have a user requirement to allow them to record how an application works and then "validate" the recording allowing the application to be released.

The issue came up of how we achieve this without sticking a video camera over someone's shoulder and I stumbled upon the "AirServer" application available here;

http://www.airserver.com/

Interesting I've been using the applicaiton for a while and ended up using Camtasia (for Mac) to capture the video being displayed on my screen. This was a little complicated and very prone to juddering if my Mac was busy doing something else at the time (i.e. running Parallels).

A few months ago AirServer seems to have received an update which allows it to natively record the displayed video (and audio). This seems to work very well, I've updated a video of a short recording I made opening Safari and browsing to a website below;


If you want to see the video on YouTube it's available;

http://www.youtube.com/watch?v=9GlNCsVW66c

The video, at 45 seconds in length, came to around 14MB (approx. 1/3MB per second - an hour will cost you over 1GB which is about right). The capture is from a retina iPad at 1440x1080.

Setting this up is fairly easy in that you just need to go into Airplay Mirroring on your iPad (providing both are connected to the same network of course!) and turn on Airplay Mirroring;


Then it's just a simple matter of pressing the "Record" button on AirServer once to start it, then again to stop it, and entering the name of the file you want to create.

Wednesday, December 11, 2013

MobileIron: Resolving "MobileIron iOS App Multi-Tasking Is Disabled" error

This one took a few minutes to resolve so in order to save anyone else some time here is what you'll see in the MobileIron control panel;

MobileIron: Users and Devices
The warning is;

MobileIron iOS App Multitasking is Disabled
Verify Location Services is enabled on the device for the MobileIron app by going to Settings | Location Services, then launch the MobileIron app once.

If you have email notifications for your users turned on they'll have received a similar email message in their local language.

Unfortunately if you've been an iOS for quite some time the title of the message will confuse you - you can't switch of Multitasking anymore. As is probably the case for lots of people (like me) you'll reach for Google and not read the rest of the message which explains the problem and lets you know how to fix it.

The issue is, basically, that the MobileIron applicaiton cannot access Location Services. This will either be because Location Services has been compeltely turned off on the device or that the MobileIron application has been specifically denied access to it.

The first step to resolving it is to open the "Settings" application;

iOS7: Settings Application
 Touch the "Privacy" item on the left (at the bottom of the "General" group;

iOS7: Settings > Privacy
In this page you'll have details of how much information you are sharing. Touch "Location Services" at the top;
iOS7: Settings > Privacy > Location Services
As you can see from this screen shot MobileIron is explicitly denied access to Location Services. If you switch this back to green then the warning will go away.


Designing and Building your CMDB, Part 2: Test, Test, and Test Again

With apologies for the large break between these two parts, a lot of project work has eaten up all my time and it's not been possible to post as often as I'd have liked!

So the questions that were left at the end of Part 1 is; how do we know we've correctly identified everything related to our system for the CMDB? The answer is, because we didn't write the software and so can't claim to fully understand it, that we don't. Now I'll explain why that doesn't matter as much as you'd think it would.

As with most things in business it's not about a 100% guarantee  - it's about doing exactly the right amount of work to minimising the risk of impact to the business from the "unknown unknowns" (those things we don't know we don't know). In order to work out the ways we've eliminated the risk we need to go back to the reason we're doing this; to take the knowledge out of people's heads and put it into a system so it can be shared. I don't need to create a CI for every item in a config file - the CMDB needs to know where the file is and what it's configuring. The rest is up to the person looking at it and the problem/ incident they're dealing with.

In order to test out that our CI's will meet our needs we need to look at how we are expecting them to be used after we've created them. Here are a few examples of the scenarios we might like to test our configuration with;
  • A user X who has just joined the company needs to be added to the users list (1)
  • User X has changed role and no longer needs access (2)
  • User X needs access to the Admin Interface (3)
  • User X can't access the system (4)
  • User can access parts of the system but isn't seeing any maps (5)
  • Microsoft has released a patch for a critical vulnerability in IIS  and Engineer Y needs to find all the boxes with IIS installed so he can patch them manually (6)
  • Emails from "System X" don't seem to be being sent (7)
As you could see this list could go on forever but, as I pointed out earlier, we're not trying to capture every possible thing that could happen - we're just trying to cover the 90% of things that are most likely to occur and a few other things we (as developers) might like to worry about.

Now that we've got out list let's go through and see whether we have enough information so that someone who isn't familiar with the system but has access to the CI structure can solve the issues we've highlighted;
  1. Looking at the CI list we have the CI "UK InfoMaps Standard Users" and "FR LocalMaps Standard Users" so if the new user joins in the UK we add them to the former, in France we add them to the latter
  2. As 1, except rather than adding them we just remove them
  3. Again we have two active directory groups "UK InfoMaps Administrators" and "FR LocalMaps Administrators" so we can add them to the right group depending on the Country
  4. The first non-straight forward one! We have the two DNS entries, the person taking the call can quickly test these and see if the service is down for everyone or just the user, if it'd down for everyone is the box down? Is the Hyper-V host down? Is the database accessible? Is there an error message? In short there are lots of things to try - and with access to the CI list you can start to do clever things like look for other services using the same Hyper-V host - if they're running then the problem probably isn't with the entire host, etc
  5. Two DNS entries provide some points for testing - is Google down (it has been known ...)? Has the firewall changed so the ports are blocked?
  6. IIS is linked to WIN005 so it should just be a quick case of searching the CMDB for IIS and seeing which boxes have IIS components on them
  7. Is the SMTP server accessible? Is the user account locked?
As you can see there is a lot here that can be done with relatively little technical experience and (trust me as a developer - this bit is key!) *if* the incident eventually gets escalated to a software engineer to look at then there is going to be a lot more information in the call so, rather than having to chase people and get answers to simple questions like "what box is it on?", a lot of that information will already be in the call because whoever answered the phone will have already done most of that work. The key here is what do you want your software engineers doing - chasing users for answers or fixing issues and then getting on with doing other work?

The next part of this series (which will hopefully not take so long to put together) will continue this example and look at metrics and the things you might like to consider doing to keep your CMDB up-to-date and relevant as your business changes.

Windows Phone 8: Turning Off Data Roaming

Whilst on many personal mobile packages it's possible (and relatively cheap) to buy international data roaming (specifically within the European Union) there will always be times when you want to make sure you are not roaming for data.

On Windows Phone 8 it's relatively easy, touch the "settings" icon;
Windows Mobile 8: Settings Application
Then scroll down until you see "mobile network" and touch that;
Windows Mobile 8: Settings
The second option, after your mobile network, is titled "Data Connection" and is typically set to "on".

Beneath that is a "Data roaming options" drop down that can either be set to "roam" or "don't roam";
Windows 8 Mobile: Roaming Settings

If you change the option then the explanation text beneath it changes;

(roam) - "Depending on your service agreement, you may incur extra changes when using data roaming"
(don't roam) - "When entering a roaming area, your data connection will be turned off"

If you don't want roaming charges to appear on your bill (for data) then select "don't roam" in the drop down. This takes effect immediately.

Tuesday, November 19, 2013

Configuring MobileIron on Windows Phone 8 (Nokia Lumia 925)

This blog post is a quick guide to configuring MobileIron on Windows Mobile 8.0. The software is integrated into the OS and therefore you don't need to install anything from the Windows App Store (like you do with iOS and Android).

To start you need to click on the "settings" icon from either your start screen on the Application List;

Windows Mobile 8.0 "Settings" Application
Once you open this application you're presented with an array of text options;

Windows Mobile 8.0 "Settings" Application (Opened)
Scroll down through list until you find "Company Apps", touch that;

Windows Mobile 8.0 Settings > Company Apps
It's actually quite good to see these warnings. Although I did laugh a bit at the "What's a company policy?" being a hyperlink ... Touch "add account" to get started;

Windows Mobile 8.0 Settings - Company Apps - Add Account
You are now presented with two options; your email address and your password. Once you've entered these touch on "Sign in" and Microsoft will attempt to work out what configuration your IT Department/ Service Provider have put into place for you. I'm not 100% sure what this is doing - but for me anyway this didn't work. After a minute or two I was presented with a slightly more detailed option screen;

Windows Mobile 8.0 Settings - Company Apps - Add Account (More Detail)

The three new options are Username, Domain, and Server. For MobileIron (for my instance of it anyway) it wasn't necessary to enter the username and domain just the server.

Once that's done just touch "sign in".

And that was it, the Phone is now in the hands of your company administrators. In my case this meant the configuring of an Exchange account.

I had a lot of trouble getting this working. A lot of trouble, but it's not clear where the problem lay with this. It would be easy to blame the phone (and certainly the one-error-message-fits-all approach wasn't particularly helpful - i.e. can you find the server? is the login incorrect?) but I can't be 100% certain. I will say though that I've never had this problem on an iPad or an iPhone but that could just be down to luck ... Let me know if this works for you in the comments, or if it doesn't!!

Once you've configured "company apps" you'll see the familiar Apps@Work icon in the your installed application list.